| Sign Up For Our Newsletter |
| Sign Up For Our Newsletter |

Using Functions on an Excel Worksheet
Using Excel X for Macintosh
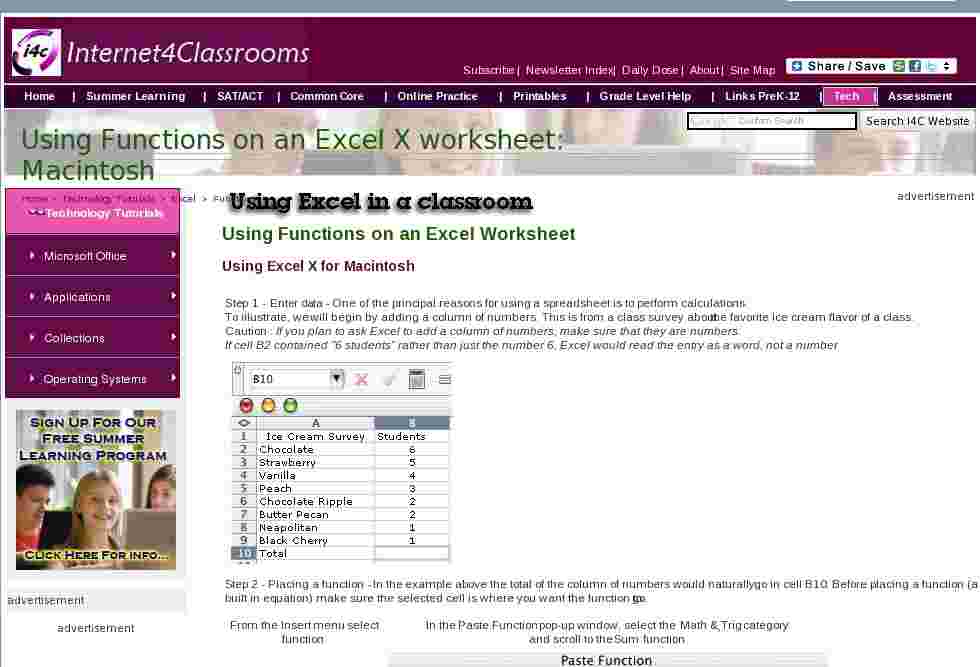
Step 1 - Enter data - One of the principal reasons for using a spreadsheet is to perform calculations.
To illustrate, we will begin by adding a column of numbers. This is from a class survey about the favorite ice cream flavor of a class.
Caution : If you plan to ask Excel to add a column of numbers, make sure that they are numbers.
If cell B2 contained "6 students" rather than just the number 6, Excel would read the entry as a word, not a number.

Step 2 - Placing a function - In the example above the total of the column of numbers would naturally go in cell B10. Before placing a function (a built in equation) make sure the selected cell is where you want the function to go.
and scroll to the Sum function

When you choose OK, the dialog box below appears. There appears to be a lot of information to deal with, but it is basically just a summary of what you asked Excel to do.

The edit bar at the top names the function ( Sum ) then lists the mathematical function to be performed ( =SUM(B2:B9) ). Excel selects the range numbers immediately above or to the left of the function. If there is a gap in the intended range you must enter the proper range in the edit bar. Example: In the data listed with Step 1, if cell B4 was empty, Excel's suggested equation would have been incorrect ( =SUM(B5:B9) ).
Choose OK. The function is placed in the cell and the sum is displayed.

What is in cell B10? The number 24 is displayed there. If the worksheet is printed the number 24 will be on the printed copy. However, if cell B10 is copied and pasted into another cell something altogether different appears. If you said that the information in cell B10 was "the sum of the range of numbers from B2 to B9." you are almost correct. To explain that almost we will paste the equation into cell C10.

The actual information contained in cell B10 is "find the sum of the range of numbers that are in the eight cells above this cell." Since there are no numbers in those cells, the displayed sum is zero.
Step 3. Using AutoSum - Remember that Excel allows you to quickly find the total of a column or row of numbers. If you forgot that from the previous page, go there to review .
Step 4. Using another function - Excel has many built-in equations (functions). One more will be used as an illustration, and to whet your appetite to discover more on your own.
Once you know how to write your own functions (next topic), Excel can be used as a substitute for a calculator. I am going to prepare a worksheet which will automatically remind me what the date is as I use my "calculator."

Cell C2 is where a Date & Time function will be placed. From the Insert menu select Function . Choose Date & Time then select the Today function.

Whenever you insert a function, a dialog box pops up to explain the chosen function.

No further action is required, select OK and today's date is displayed. Tomorrow when I open this workbook, a new date will be in cell C2.
Step 5. Explore - Look through the Paste Function pop up window later to discover what equations are built into Excel.

Internet4classrooms is a collaborative effort by
Susan Brooks and Bill Byles.

advertisement
advertisement
Use of this Web site constitutes acceptance of our Terms of Service and Privacy Policy.
