| Sign Up For Our Newsletter |
| Sign Up For Our Newsletter |
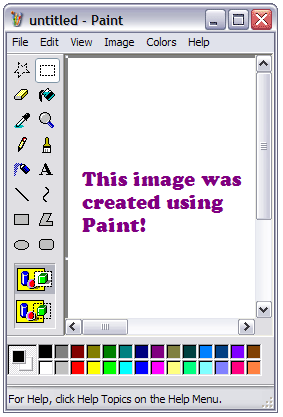
Print Screen to Paint to Word
There! Right in the middle of your screen! Exactly the right image to illustrate a point on the document you are writing. Now the only problem you face is how to get the image onto your document. This tutorial will assume that the image can not simply be copied and inserted as is.
Step 1 - Print Screen. You have noticed the key, somewhere in the upper right part of your keyboard. The one labeled Print Screen or PrtSc. Scroll in the window to place the image, or part of an image, so all of it can be seen. Then press the PrtSc key, but don't look toward your printer. A paper copy would do you no good, but you have made a digital copy and it's stored in your clipboard. You copied the entire screen. (If you want to copy just a dialog box, hold down the Alt Key as you press the PrtSc key.)
Step 2 - Open Paint. Click on the Start button (bottom left corner of your screen), slide up to Programs, then slide up to Accessories, and finally slide over and down to Paint .
Step 3 - Paste the image of your screen in the Paint window by holding down the Ctrl key and then tapping one time on the V key. Yes, you can go to the Edit menu to select paste, but which Edit menu? If you have been following directions you will see two Edit menus in the top left part of your screen. One, the lower one, is only a picture of an Edit menu.
Step 4 - Use the Paint Tools to Edit the Image. The buttons are identified below:

Freeform Select 
Color Picker 
Airbrush 
Rectangle 
Select 
Magnifier 
Text 
Freeform 
Eraser 
Pencil 
Line 
Ellipse 
Fill with Color 
Paint Brush 
Curve 
Rounded Rectangle Some of the buttons have qualifiers which may be chosen after the tool button is selected

Use with Select, Freeform Select, and Text
When you select a part of an image to move to another location, or text to put on the image, the background of the selected image will be opaque
Use with Line and Curve
Change the thickness of the line
Use with Brush
Determine the shape and size of the paint brush
Use with Select, Freeform Select, and Text
When you select a part of an image to move to another location, or text to put on the image, the background of the selected image will be transparent
Use with Rectangle, Freeform, Ellipse and Rounded Rectangle
The top rectangle draws a shape whose inside will be transparent. The middle rectangle draws a shape whose inside will be opaque. The bottom rectangle draws a shape filled with the selected color
Use with Airbrush
Determine the size of the airbrush spray
Use with Eraser
Change the size of the eraser. If you need to erase a single pixel, use the pencil with background color
Use with Magnifier
Set the amount of magnification to be usedStep 5 - As an example of the process, this module will overlay two images from the Tennessee Department of Education . Go to the page and scroll to the bottom so that you can see the Great Seal of the State of Tennessee and a blue rectangle labeled Tennessee facts. When you have done that, find the Print Screen button and press it one time.
Step 6 - Open Paint and paste what you stored in the clipboard into the Paint screen. Some versions of paint will expand with the image, others will display a Paint dialog box with the message "The image in the clipboard is larger than the bitmap. Would you like the bitmap enlarged?" The answer to that is Yes.
Step 7 - You may have to scroll down in the Paint window to see both the Great Seal and the Tennessee facts button. To make more working space select parts of the image that you will not be using and press the delete key. The select button may look as if it is already selected, but you must click on it to use the tool to highlight a part of the image.
Step 8 - After you have cleared some working space in the middle of the screen, use the Select tool to draw a box around the blue Tennessee Facts button. Put your cursor in the middle of the boxed-in image, then click and drag the button into the middle of the white pace.
Step 9 - If the Select tool button is still selected, choose the button that makes the background transparent. Draw a box around the Great Seal and move it so that it covers the top right corner of the Tennessee Facts button. Don't let go of the image until you have it exactly where you want it. If you drop the image some place that do not want it, go to the Edit menu and select Undo, and then try it again.
Step 10 - Use the Select tool button to draw a box around the new image you created, and then copy the image.
Step 11 - Open Word, or go back to the Word document you were working on and paste the image into your document.
Step 12 - (This step may not be necessary) If your version of Word will not allow you to move the image you just pasted, right-click on the image. Select Format (or Object), select the Layout tab and then select Tight or Square. You may now move the image wherever you wish to.


Internet4classrooms is a collaborative effort by
Susan Brooks and Bill Byles.

advertisement
advertisement
Use of this Web site constitutes acceptance of our Terms of Service and Privacy Policy.
