Using Inspiration in your classroom
Page last edited 5/8/2009

Click on the logo to visit Inspiration's homepage
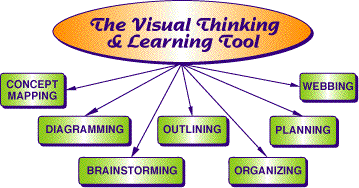
One of the best ways to see what the application can do is to look at some examples which other teachers have created.
Each of the examples below was linked to the Inspired Classrooms page showing examples of diagrams .

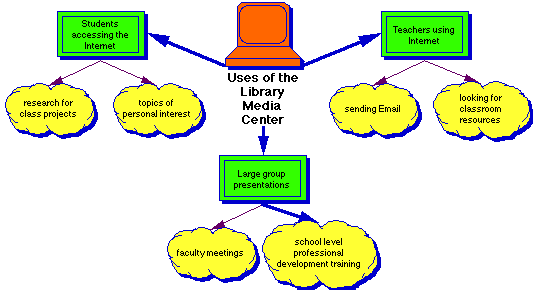
Now that you have an idea of what others have done with Inspiration we will make a concept map using the application. The basic format of our concept map will be:
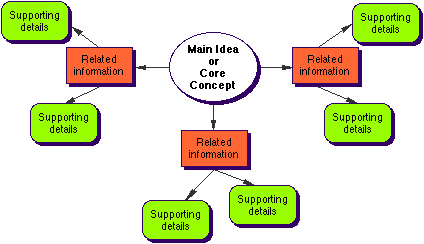
Use the following information to produce your concept map:
- Main Idea - Uses of the Library Media Center
- Related Information - Students accessing the Internet
- Supporting details - research for class projects
- Supporting details - topics of personal interest
- Related Information - Teachers using Internet
- Supporting details - sending Email
- Supporting details - looking for classroom resources
- Related Information - Large group presentations
- Supporting details - faculty meetings
- Supporting details - school level professional development training
Step 1 - Launch Inspiration
Step 2 - Read the Tip of the Day. The first few times you use Inspiration this may not be as helpful as it will be later. When I launched Inspiration to produce this I saw the following:
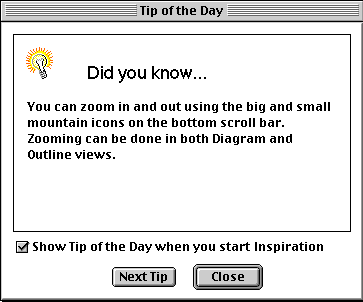
Step 3- Modify the Main Idea balloon which opens when Inspiration is launched. The default style is an oval like the one below:

While the balloon is selected you may change it to any of the other styles available. You move from one page on the symbol palette to another with the left and right arrows at the top of the palette. The middle arrow allows you to jump directly to a specific page on the palette. Those arrows can be seen in the image below:

Step 4 - Click on the words "main idea", highlight the words and type in the main idea, "Uses of the Library Media Center."
Step 5 - Highlight what you just typed, go to the Format menu at the top of the screen and change the size of the words to 12 point in the Size submenu and make the main idea Bold in the Style submenu.
Step 6- Click away from the main idea, and use the symbol palette to select the shape which you will use for the related information. Use the same shape for all three. They can be moved to any place on the page, but things may be easier if you click where you want the shape to be placed before each new one is placed. After all three are placed modify the three with the assigned topics: Students accessing the Internet , Teachers using Internet and Large group presentations . To place words in the shape you chose, double-click in the shape.
Step 7- Create links
As you looked through the examples above you noticed that items are linked by arrows. To create a link click on the Link icon at the top of the window (seen at the right), click on the first object to be linked, then click on the second object to be linked. Repeat the procedure until all related information shapes are linked to the main topic.

Step 8- Place supporting details. Follow the same procedure to create six balloons for the supporting details, two around each of the related information balloons. When the six balloons have been placed and labeled, link each to the related information balloons using the outline given above step 1.
Step 9 - Use fill color to group related topics. Click on the Main Idea, Related Information, or Supporting Details. Go to the Effect menu at the top of the page and select a color from the Fill Color submenu. Repeat this procedure until each of the three areas on the outline has been colored. [ Note: all balloons of a similar type can be recolored at the same time. Click on one, hold the Shift key down and click on each of the other balloons. When you select Fill Color, all will be recolored at the same time. ]
Step 10 - Distinguish between the link arrows connecting the main idea to its related information by changing the line color and thickness. Select all three link arrows by using the shift technique taught in Step 9. After all arrows are selected go to the Effect menu at the top of the page and select the Line Thickness and Line Color sub menus to make changes.
Step 11 - For the purpose of comparison only, compare my concept map to yours.
Many of the graphics and examples on the site were provided courtesy of Inspiration Software, Inc.
Download an Inspiration document. Save these documents to your computer, or on a disk, and use Inspiration to open them. If your computer says it does not recognize the file, save it anyway. The extension is correct.
Other Internet tutorials
- How to create visual organizers , posted for staff development by San Diego Schools, makes effective use of animated images to illustrate step-by-step concepts

Use of this Web site constitutes acceptance of our Terms of Service and Privacy Policy.