Using the Links Toolbar Effectively
There are many uses to this hidden toolbar. You can quickly individualize assignments on the computer using this technique. Use your computer center time to help individual students or groups of students working on the same concept with this simple set-up. Set up each of your groups with a different web page of activities according to their levels.
Parents can customize this toolbar for multiple family users. Create a link to individualize a web site for each child.
The Links toolbar is often hidden. In the image below all that you can see is the word Links. You know that there are some links on this toolbar because you see the double arrows pointing right. If you click on the arrows, the list of links on this Links toolbar will be displayed. Look immediately to the left of the word Links below. There is a vertical white line which indicates that the toolbars are locked.
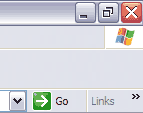
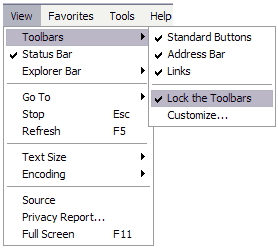
To make this toolbar more useful you can display the toolbar area below the web address. However, you must first unlock the toolbar. From the View menu select Toolbars and then slide down to Lock the Toolbars. Click there to remove the check mark and your toolbars will be unlocked. ( Some school systems have the computers set up so you are unable to unlock the toolbars. If this procedure sounds helpful to you, talk to someone in the technology department about getting the ability to unlock and display the Links toolbar. )
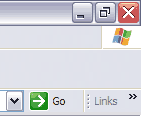
After unlocking the Links toolbar you should notice a change to the left of the words Links. On the toolbar in this example you now see four vertical dots. On some computers you will see a vertical bar. The Links toolbar is now ready to be moved down.
Put your mouse pointer directly over the vertical dots or vertical bar. Your mouse cursor should change from an arrow to a double headed horizontal arrow. On some computers the mouse pointer turns into a four headed arrow. Either cursor will allow you to move the Links toolbar down.
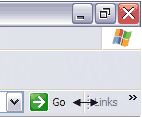
Click once with the left side of your mouse, leave the mouse button depressed and drag straight down. The toolbar should be displayed below the address bar of Internet Explorer.

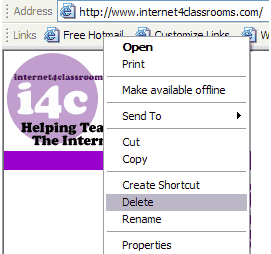
If this is the first time you have used the Links toolbar, you will find four links already stored there. None of them are needed in a K-12 classroom. To remove a link, put your mouse cursor over the link and click with the right side button of your mouse. From the pop-up menu that opens, slide down and select Delete. Internet Explorer will ask you if you really do want to delete the link. Say yes.
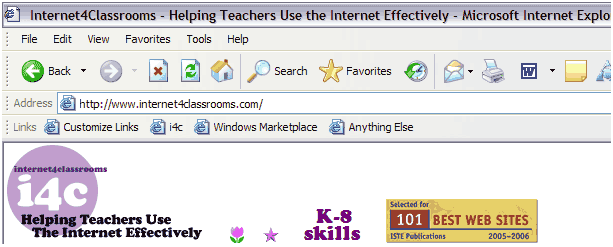
On the image below, notice that the Free Hotmail is gone, but also notice that a new link has been placed there. Placing a link on the Links toolbar provides one click access to web sites that you place there. The question in your mind at this point is probably, "How do I place a link on the Links toolbar?"
Notice the blue Internet Explorer just to the left of the web address (URL). It looks like a document with a blue e pasted on it.
With the left mouse button, click on the blue IE icon and drag it down onto the Links toolbar. If you drag it to a place where something else is sitting, your mouse pointer becomes the International symbol for No , a circle with a diagonal slash in it. That means, "No, you can't let go of your mouse button yet."

If you drag the blue E icon to a space between other links, your mouse pointer turns into an I beam, a black vertical line. This means, "Yes, you can let go of your mouse button."

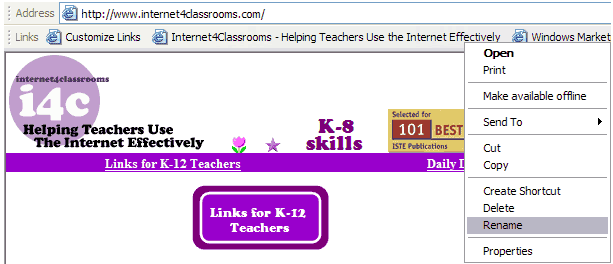
A second or two after you release the left mouse button, the new link will pop up. In the example below the name of the link is much too long. Put your cursor over the link and click on the right mouse button [right-click]. From the pop-up menu, select Rename and type a new name. I named the link i4c rather than Internet4Classrooms . If you are adding link for your students to use in classroom workstations, name the links something short, but appropriate for the activity or students. "Monday lesson," or "blue group," are two examples.

Use of this Web site constitutes acceptance of our Terms of Service and Privacy Policy.