Page Options in Microsoft Word
Orientation, Borders, and Shading
For this lesson you will modify a sign which you created in the last lesson. You will place a border around one line of text, place a border around the entire page, and add shading to selected text.
Step 1.Open Microsoft Word. Remember to leave your browser window open until this lesson is finished.
Step 2. Open a new blank document using keyboard commands
- IBM - Use Ctrl+N (Hold down the Ctrl key and tap the N key one time)
- Macintosh - Use Command+N (Hold down the Command key and tap the N key one time)
Step 3. Turn the document to landscape orientation, that makes the longest dimension the width of the page, not the depth. Go to the File menu, select Page Options, choose Orientation and select Landscape.
orStep 3a. Open the Computer Rules document you created during the last lesson. If you did not save that document you can download one from the server .
Step 4. Place a border in the document. First we will place a border around just the title.
- Highlight the title
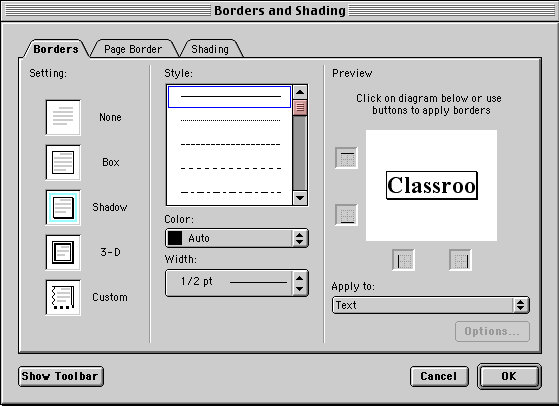
- Go to the Format menu and select Border... , and choose the Borders tab

- Select the style, color and line thickness of your border. Click OK to place a border around the highlighted text.
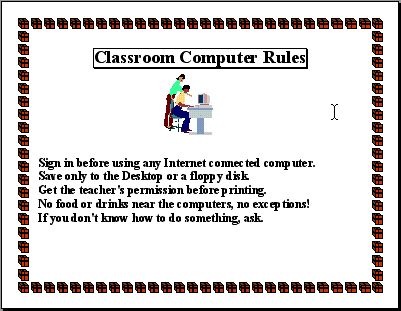
Step 5. Next place a border around the entire page. Go to the Format menu and select Border... , and choose the Page Border tab.
In the middle of the Borders and Shading window, near the bottom of the window you will find a button which will allow you to put an artistic border around the entire page.

Step 6. Click on the down arrow to display the choices. Scroll through this list to find the one you prefer. There is a huge selection here. The graphic below illustrates only a portion of what is available:

(I turned this list on its side to take up less space on the page)
Step 7. Click OK when you have made your choice. This places the border around your document.

(No computers in the art borders!)
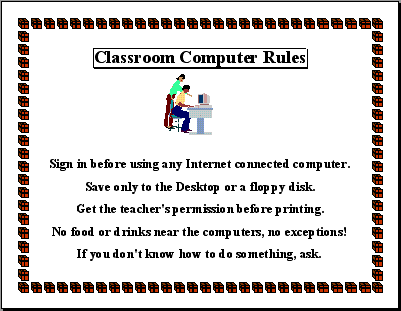
Step 8. Go to print preview using either the File menu or the Standard toolbar. Make a judgment regarding the appearance of your sign. Regarding the example above, I would make two changes: (1) the text is crowded on the left, and (2) there is too much empty space below the rules
- Crowded text - Solutions: center the text, tab each line over. (Do not use the space bar, tab!)
- Empty space - Solutions: increase font size, increase spacing between lines

(I selected center, and 1.5x spacing )
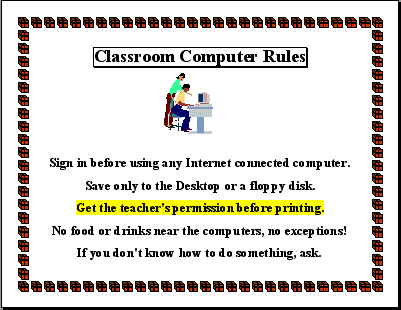
Step 9. As a finishing touch, use the highlight feature to stress one particular rule in the sign above. I want to call attention to the third rule.
- Use the Highlight button in the Formatting toolbar by clicking on the down arrow to select a color
- Use the Format menu, select Borders , choose the Shading tab in the Borders and Shading window, select a color.

Step 10. Print your masterpiece.
Assignment Leave your browser window open. Open Microsoft Word, if it is not already open. 1. Open a new Word document to be used to create a sign.
2. Turn the document to Landscape orientation.
3. Insert an image at the top center of the page using Word Clip Art.
4. Create a title for the sign. Suggestion: "Internet Rules"
5. Create a list of 3-5 rules. Suggestions? I'm glad you asked :-) Sign the log sheet before using the Internet
Use only the bookmarked sites assigned for your project
If you quote a site, record the URL and date
Do not print a web page as your report
No searches without the teachers permission 6. Adjust the size and spacing of text to make a pleasant appearance
7. Save the document to a floppy disk or the Desktop
8. Print the document and proudly post your work in your classroom.This concludes your introduction to Microsoft Word. This has only been an introduction and you must continue to use Word regularly to really absorb all that you have been introduced to. With this introduction, you should now feel confident to assist your students to use common features of Word as they:
- produce collaborative reports
- make journal entries
- do creative writing
- plan project assignments
- record data from experiments
- create a business plan
- truly begin to see the classroom computers as a tool for them to use
Download a copy of the classroom rules document
Go back to Using Microsoft Word to Produce Classroom Documents
Save this document to your desktop, then open it in Microsoft WordJovana Milutinovich recently translated this tutorial into Serbo-Croatian. To see it click here. Thanks Jovana!

Use of this Web site constitutes acceptance of our Terms of Service and Privacy Policy.