
 |
Links for K-12 Teachers | Assessment Assistance | On-Line Practice Modules | Daily Dose of the Web
Using the OS X Dock and other Desktop item
The Dock - Take some of the features of the
Mac Classic Control Strip and combine them with some of the features of Classic's
Apple Menu Items and you get the Dock.
![]()
Dock preferences can be found under the blue Apple. Click once on the Blue Apple in the top left corner of your screen. Slide your mouse pointer down to Dock then slide right to select Preferences. Several changes are possible. Play around with the settings to see which you prefer. I keep my Dock on the left and I set it to automatically hide. You decide what is best for you.
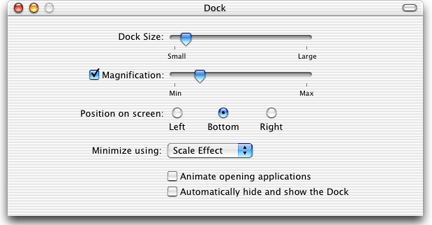
The Dock below was set to almost minimum magnification.

If you set the preferences to Maximum magnification, you would see something like the image below.

Adding or removing Dock Items - To add an item to the dock, find the icon that launches the application and drag it to the Dock. You may place the item wherever you wish to. Slide the icon back and forth till it is where you want it to be and let go of the mouse button. To remove an item from the dock, click the icon and drag it from the Dock.
Moving through open applications on the Dock - If you miss the nice neat overview of all open applications found in the Application Menu of Classic, you may be interested in a keyboard combination. Hold down the Command (Apple) key and tap the Tab key. An open application will be highlighted on the Dock. As you continue to tap the Tab key you move to the next open application. To enter that application release the Command key. This works in Classic as well, you just don't have the Dock.
Hard Drive - To see everything that is installed
on your computer, go into the Hard Drive icon. That icon is located
in the top right part of the screen. The icon on my screen is a much more
realistic image of a hard drive: 
To view the contents of your hard drive, place your mouse pointer on the HD icon and gently click twice. You may use one of three views to see what is located on your computer. To change from one view to the other move your mouse pointed to the Views menu and select from the list of three views. The view you use is purely a matter of personal preference.
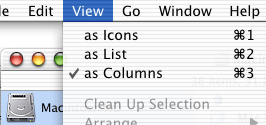 Notice that you can change views with the Command key |
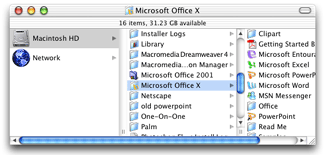 View as Columns |
|
View as Icons |
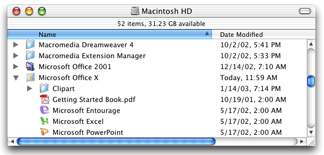 View as List |
Contextual menus - If you are bilingual (you speak Mac and PC), and miss your right mouse button when on your Macintosh, relax. Right-click menus on a PC are called contextual menus on a Mac. To right click your mac, hold down the Control key while clicking (Control + click). To see how this works, minimize your windows, and find something on your desktop that you can move to the trash. If you have nothing safe to trash, hold down your Control key and click on an empty portion of your desktop. From the contextual menu that pops up, select New Folder. To move that folder to the trash, put your mouse pointer on the folder icon, hold down your Control key and click on the folder. Move your pointer down to Move to Trash and click. The folder is now in the trash.

See a module to find out more about "right-clicking
a Macintosh."
Screen Capture - There are several ways to capture what is on your screen.
Command + Shift + 3 - The old way to take a screen shot in Mac Classic still works. The image is stored as a .pdf file and includes the entire screen
Command + Shift + 4 - This produces a cross hair mouse pointer. Click and drag to cover some smaller portion of the screen. When you let go of the mouse the outlined portion of your screen is saved as a .pdf file. If you change your mind about the screen capture, press the esc (escape) key. If you want to put the screen shot on the clipboard, rather than create a file, hold down the Control key when you press the other keys. You can then paste the picture into a document.
After using Command + Shift + 4, press the space bar. That brings up a camera, actually it replaces your mouse pointer with a camera. Click with the camera on the active window and only the active window will be captured. (Thanks to Kevin Cranford for that tip)
Using Grab - OS X includes an application names Grab which also can be used for screen capture.
Capture a selection - Click and drag around the selected part of your screen. When you let go of your mouse the image pops up in .tiff format.
Screen - If you select this option, you will get an image of the entire screen, in .tiff format, with your mouse pointer superimposed over the image.
Timed Grab - This allows you time to maneuver to a window which you wish to take a shot of. This is also saved in .tiff format.
Key Caps - Even though it makes no ¢ (sense), do you sometimes have a ¥ (yen) to £ (pound) on your keyboard? Special characters such as the ones in that last sentence are included in almost every font on your computer. Key Caps is the application which shows what characters can be revealed by depressing the Option, Command, Control, or Shift keys in each font.
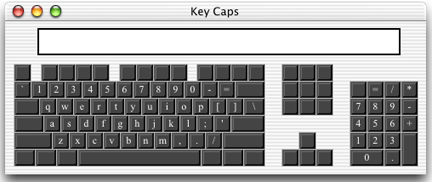 A keyboard displaying Helvetica Regular lowercase |
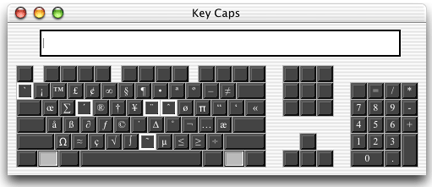 If the Option key is held down, the characters above can be typed when the font is set to Helvetica Regular. |
Key Caps was stored in the Apple Menu Items. It is not as easy to find in Mac OS X. To find Key Caps go to the Mac Desktop, or make sure you are in the finder. Hold down the Command key (Apple) and press the F key. If you find this little application helpful, add it to the Dock by dragging the icon onto the Dock and releasing your mouse button. In the search results window below the second icon is the OS X version of Key Caps.
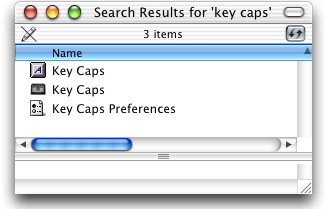
Tip from Kevin Cranford - You can find the Key Caps application in the Utilities folder which can be found in the Applications window. Remember an easy to open that? Hold down the control key as you click on any of the iApps in the dock (iMovie, iTunes or iPhoto). Then select Show in Finder.
Task - Open Key Caps, set the font to Wingdings, and find
the keystroke combination to produce the oriental yin/yang symbol. ![]()
Mouse | Windows | Desktop | Built-In | Saving | Keyboard

Custom Search
|